LPDstudios Blog: Behind the Scenes - Copper Hearts and Sterling Silver Ring with Custom Initials
Part of the joy in making one of a kind pieces is creating something that people love to give and receive. My Copper Hearts and Sterling Silver Rings with Custom Initials have been so fun to make, because each one is custom made with any initial you want! Whether it be your own initials, loved ones, a pet or a place, you can choose one to three letters that are hand stamped into the floating hearts. Take a look at how these sweet little rings are made.
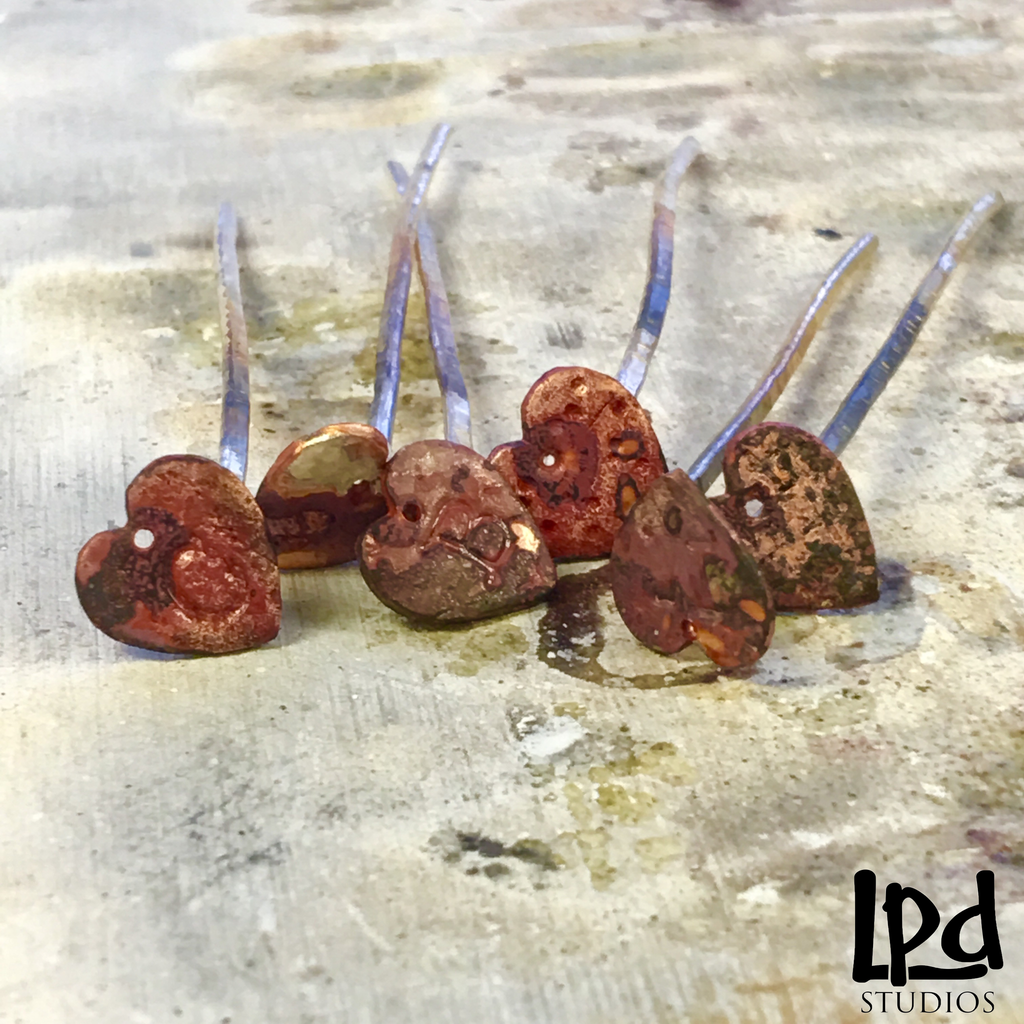
Just like you saw in my earlier post, Behind the Scenes: Metal Clay, the individual hearts are made using copper clay. Copper clay is a unique material, because in the early stages I can manipulate it just like clay. For these pieces, I roll out the clay to a very precise thickness. Too thin and the metal clay will break, but too thick and it will be too bulky. Then I carve out my varied size heart shapes, texture each surface using hand tools and add your custom initials. I love them because from ring to ring, the hearts are texturized in all different ways, each one unique. Once I am happy with each heart, I put them in my kiln for firing. Here is a picture of the last batch of heart rings I made after they came out of the kiln and cleaned up. You can see that some people order them without initials, which is nice too, because you can really see the texture on the surface.

To make the sterling silver shank I start with square sterling wire. It comes in big spools, so I cut the length of the wire based on the size ring desired, and flatten it using a hammer.

Using a hammer on sterling silver is a balance between using enough force to flatten and forge the wire without having thin spots or damaging it. My goal is to get the shank thickness as consistent as possible on the entire length of the wire, but making the ends flatter than the rest in order to solder my hearts on!

The next step is to fix my copper metal hearts onto each end of the sterling silver wire by using solder. To summarize the soldering process, I take a piece of solder and put it in between the copper and sterling pieces, heat the site, and the solder melts, affixing the two pieces together. Here is a picture from above looking down at the sterling wire and copper heart being held in place with tongs before I take the torch to heat the solder to its melting point.


After joining one side of the wire with a custom made heart, I now shape the wire into a ring shape using a mandrel and a jewelers hammer. This special type of hammer typically has a head made of raw hide, rubber or plastic so that you can shape the metal without damaging the surface. Here you can see what they look like after shaping some, and then I will repeat the soldering process to affix the other heart.

This is the finished product after soldering the other hearts on and polishing everything up! What is nice about this ring is that it comes in two sizes, small or large, but you can also pinch it or pull it slightly for a closer fit.

Visit LPDstudios to find out more about the Copper Hearts and Sterling Silver Whimsy Ring, or the Copper Hearts and Sterling Silver Ring with Custom Initials! And place your custom order within the next week to receive your ring in time for Valentine's Day!!!